


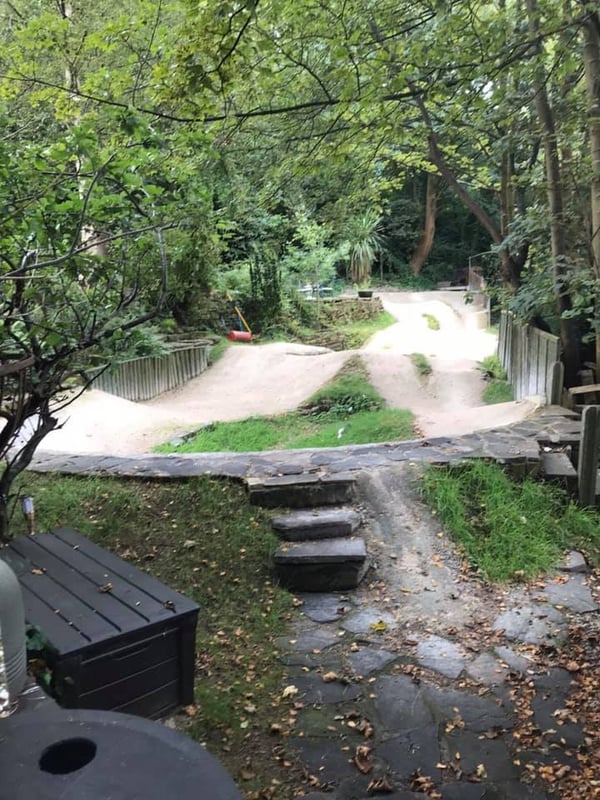
You love riding pumptracks and you’re tired of traveling to get to one. We get it. So we’ve created this awesome guide to help you plan, build and enjoy a dirt pumptrack in your own backyard.
While you can build a pumptrack for almost no cost using dirt from your yard, shovels and significant manual labor, we’re assuming that you’ll invest some money to create your perfect track (and as you read further, you’ll understand why we recommend this method.)
Step one: Plan and design your track. Plan thrice, measure twice.
Planning and designing your track is the most important step of the entire process to make sure you end up with a product you enjoy for a long time versus a lumpy and purposeless landscape, overgrown with weeds. This was the biggest takeaway from our interview with Lee McCormack, whose e-book Welcome to Pumptrack Nation: How to Build and Ride the Best Pump Track on Earth - Yours is a great resource for those serious about pursuing backyard pumptrack dreams. He emphasized this step over and over again: spending time on planning and design will save you countless hours and deliver an awesome pumptrack.
1a. Determine the amount of space you have to build a track.
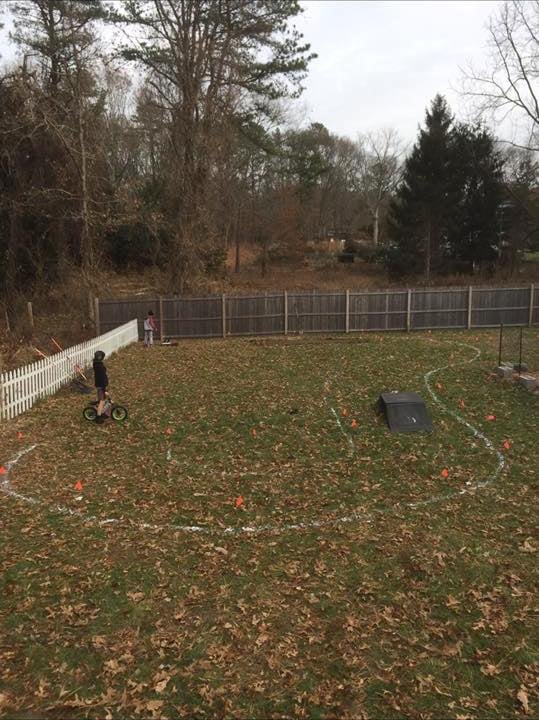 Michael Drake's backyard with its future pumptrack outlined on the ground prior to ground breaking. Scroll to see how it turned out! 👇 Photo courtesy of Michael Drake, BackYard Pumptracks Facebook Group.
Generally speaking, the minimum amount of space required to build a backyard pumptrack is 6 m. x 6 m. Lee also reminds us that there is a sweet spot to pumptrack design: you want enough space, but don’t want the track to be too big either. A track that is too big can take away from the pumptrack experience, making it harder to ride and requiring more maintenance. Start small: there’s always room to grow, so start with a small and simple design, rather than attempting something more complex.
1b. Sketch out your track on paper, including all measurements.
Using the dimensions you calculated for your track’s space, sketch out your design, complete with precise measurements. Here are the recommended specs for pumptrack design from Lee’s book:
- Berms: These are the turns in the track. A radius of three meters is recommended. Keep in mind that when you build these, you’ll add 50% more dirt than the final dimension height to account for compaction.
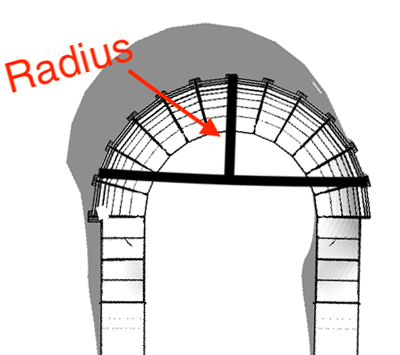 A drawing demonstrating the radius of a pumptrack berm.
- Rollers: These are the bumps in the track. The roller length-to-height ratio is 10:1. For example, If your rollers are 30 centimeters tall, they should be spaced three meters apart.
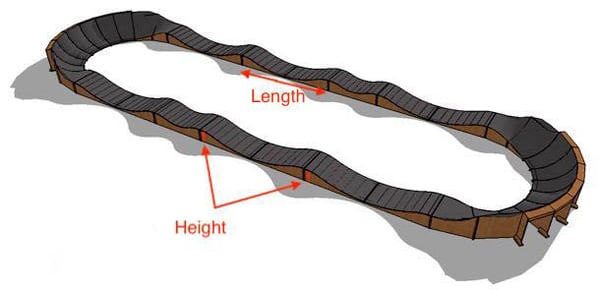 A pumptrack roller lengths and heights
- Drainage: Planning and accounting for proper drainage will determine if you wind up with a mud puddle or an awesome pumptrack. A track built on a 2-3% grade is recommended so that you can direct water off of the track. For areas where water might runoff and pool, you’ll need to dig and grade accordingly so your track has proper drainage. For the berms, Lee recommends digging into the bottom of the turn to make a ditch for the water, then covering this area with gravel.
To take the guesswork out, we’ve included a basic pumptrack plan below, and on Lee’s website you can purchase track designs for as low as $5.00.
1c. Paint your design on the ground, make design changes and repeat until satisfied.
Using marking paint to paint your pumptrack design onto the ground in your backyard. By using paint, you’ll be able to visualize obstacles like tree branches, stumps or bushes that may throw a wrench in your initial design. Continue to adjust your design, until you’re aesthetically and structurally satisfied. Spending time committing your design to paper and testing your design outside is an absolute prerequisite to a fun and functional track.
❗🙅 Reminder: don’t forget to call before you dig. 🙅❗
The last thing you want to do is rupture a utility line underground when you begin digging. Your local municipality has a “call before you dig” phone number in order to make sure you know where the gas, power and water lines are before you start.
Step two: Budget for and collect the materials and equipment you’ll need.
Take it from these guys at Mountain Bike Action Magazine, whose first attempt at a pumptrack failed due to “a lack of expertise and underestimating the labor and materials necessary to complete a viable pump track,” but whose second attempt was successful with the help of a truckload of dirt, an earth mover and serendipitous counsel. In order to ensure you don’t fall victim to the same mistakes they made, we’re providing this handy checklist below.
Materials and Equipment List
- Dirt/Soil. 37 - 46 cubic meters minimum. For comparison sake, a big, full-size 12 x 24 m. track requires 91-110 meters of dirt. The type of dirt you’ll want to buy is “loam,” a mixture composed of organic, clay and sand soils. Ask for “clay loam” or topsoil (loam) with clay mixed in. This kind of soil packs the best. Pricing of soils varies by location, but for the good stuff you can expect to pay €30-€40/cubic meter of soil, with a delivery charge that depends how far you are from your supplier. Some suppliers will wave the delivery charge based on volume.
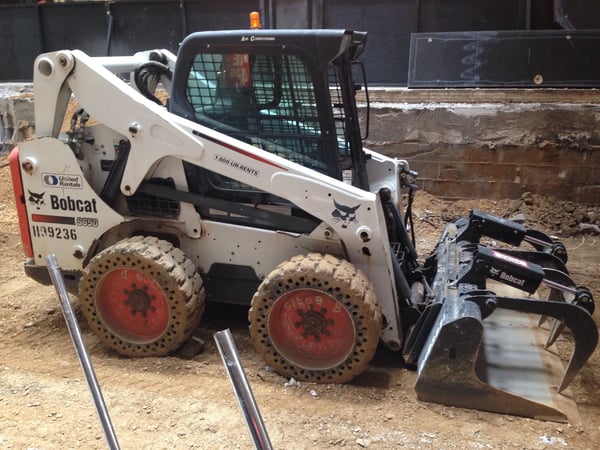
- Earth mover. Rent a compact or skid steer loader. Estimated cost: €115/day, €495/5 days, €1660/20 days. Research local equipment rental suppliers to collect quotes.
- Compactors/Tampers. Manual tampers, pile drivers, rammers and wackers are all names of this equipment used to do one of the most important jobs: pack dirt. Anticipated cost: €34/day, €150/5 days, €500/20 days.
- Flat Shovels. These are used for manually moving and packing dirt.
- Brooms. Brooms are used to sweep light debris and loose dirt off the track as-needed.
- Rakes. Rakes are helpful in shaping the dirt and filtering out any pesky rocks in your dirt.
- Hoe. Used to break up dirt, chop through ground and shaping.
- Humanpower. Get as many friends that are willing to pitch in and help out! Promise free lifetime rides on your track, food and refreshing beverages.
- Gloves. Even using equipment, making a track is a lot of work and without gloves, your hands will be covered in dirt and more easily blistered.
- Marking paint. Used extensively while planning and building for sketching your track on the ground.
- Work shoes. Building a pumptrack is dirty work, so come prepared with shoes that will support you, but you won't mind ruining either.
- A hose for watering while building. Watering and letting your track dry repeatedly through the process is critically important for a well-compacted, sculpted and resilient track.
💡Pro tip: Plan ahead and pack food. You’ll be renting expensive equipment, so plan your food, drinks and snacks in advance so you don’t waste time.
What happens with poor planning and budgeting?
Here are just a few of the potential headaches you might run into with the low or no-budget approach:
- Bad dirt. Using your own dirt or donated dirt from a nearby construction site might be free, but may be full of rocks, roots or be comprised of soil that is difficult to work with.
- Extended timeframe. By digging and moving dirt with elbow grease, you’re guaranteed to drag out the length of your project, which can lead to other complications.
- Increased exposure to the elements. The longer it takes to complete your track, the more likely you are to run into issues related to inclement weather that can make digging and building a drag.
- Reduced focus and excitement. You’re building a pumptrack because you want to ride it, not because you love building pumptracks. Given the extended timeframe, you run the risk of losing your motivation to finish the job.
Step three: Constructing your track.
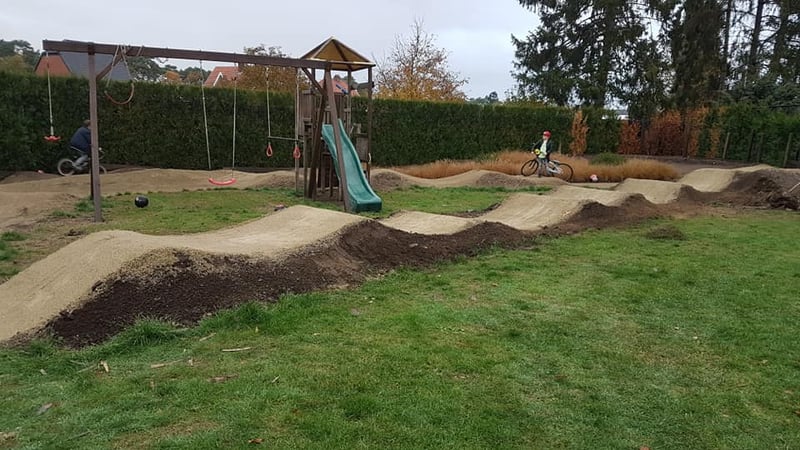
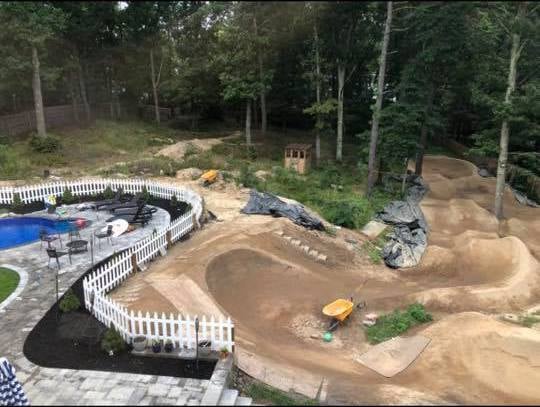
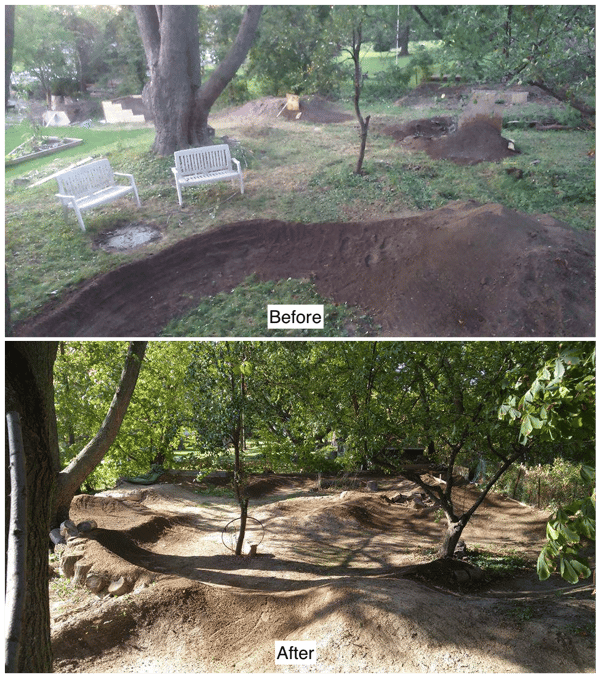 A backyard pumptrack shortly after construction has started and after completion. Photo courtesy Chris Garbett, BackYard Pumptracks Facebook Group.
Finally! You’re now prepped and ready to begin construction.
3a. Rough out the track.
Clear any organic material (leaves, branches, twigs, etc.) and soft topsoil to get to the firmer dirt underneath. Clear away bushes and cut back branches that infringe upon your track. Then, using your plans and marking paint, measure and mark out your course.
3b. Build the berms, or turns of the track.
The berms are the corners of your track, and will be the most laborious part of the track to construct. Berms should be built as one continuous curve that goes gradually from flat to vertical. A radius of three meters is recommended so that your berm is tight enough to pump, but not so tight you struggle to make the turn. Add 50% more dirt than the height of your planned design, so if you want a 1 meter final height, start with 1.5 meters of dirt.
💡Pro tip from Lee: work from the top down. Pile your dirt high, and slide the loose dirt down the face to get the shape you want and pack your dirt throughout the whole process (you can always add a bit, or shave a bit off later)
3c. Build the rollers, or bumps in the track.
Next, build your rollers. Remember that you want the entire track, not just the rollers, to rise and fall in a smooth and even way. Try to eliminate flat space on your track because this removes the “pump” out of the pumptrack. Build rollers close on either side of your berms so you can build speed going into and out of the turns, and to ensure the pump and continuity of the overall course. Your track should have a uniform width as well.
“The whole track is a sculpture: a study in constancy and flow."
-Lee McCormack, leelikesbikes.com
Step four: Pack, water, ride. Pack, water, ride. (Forever)
This ninth step also comes from Lee, and takes place throughout the entire process above, which is to use your compactors and tampers to pack your dirt in, water your track, ride your track and repeat the process. Inspect your drainage and confirm that your plans will work to move water off the track. The result of this repetitive process will be a well-established track composed of tightly-packed dirt that can stand up against frequent use and incremental weather.

Step five: Final trim and landscaping.
You’ve planned, built, packed, watered and ridden and you’re ready to enjoy the fruits of your labor with your new backyard pumptrack. But before returning your equipment and putting away your gloves, consider making sure the track becomes more than function, as a natural and beautiful addition to its environment:
- Final edge trimming. Make the edges of your track prominent to increase its aesthetic appeal.
- Add native, low-maintenance plants and vegetation. Visit or call your local gardening store for recommendations on plants that can easily grow around your track in your area. This step not only beautifies your investment, but also cements your design because as the plants grow, the roots help to support the track’s shape.
Many thanks to Lee McCormack for your expert input on this post. If you’re interested in buying Lee’s ebook (which includes more information than we include here such as building interchanges and sample plans) or improving your mountain biking skills, check out his website here.
Are you thinking of building your own pumptrack? What other information would be helpful in this post? Tell us in the comments, because we routinely monitor feedback and update posts accordingly! If you’re building your own backyard pumptrack, please get in touch because we’d love to feature your photos here or in our social media channels.
